
Introduction to Volume Discount campaign
What is Volume Discount?
Volume Discount is a campaign type designed to incentivize customers to buy larger quantities of specific products at once. In this campaign, the discount amount varies depending on the quantity purchased.
What sets our app apart is its flexibility - you can set up nearly unlimited levels (up to 100 levels) for your volume discounts. Now, let's move on to the configuration process.
Create a Volume Discount campaign
In this instruction article, we will use this example of setting up a Volume Discount campaign for a snowboard product with 3 levels:
- Buy 2 Green Snowboard, save 10% OFF
- Buy 3 Green Snowboard, save 20% OFF
- Buy 4 Green Snowboard, save 30% OFF
Step 1: From the Campaign list, click on New campaign. Then, select Volume discount

Step 2: Set up the Campaign info
- Campaign name: The name of the campaign, this will not be shown in the storefront but it's used to manage your campaign list. Try to make it as descriptive as possible.

-
Active dates
You can schedule Start date and End date (Optional) for the campaign

The time zone is based on your default settings in Shopify admin

Step 3: Select the product(s) or collection(s) that you want to apply discount.

Step 4: Select the campaign logic type to which you want to apply the discount

- Same variants: The discount only applies if the customer adds the same variants.

- Any variants: The discount applies if the customer adds any variants.

Step 5: Discount tier
As image below, your campaign has 3 tiers:
- When customer adds 2 items, they will get 10% for total amount of 2 items
- When customer adds 3 items, they will get 20% for total amount of 3 items
- When customer adds 4 items, they will get 30% for total amount of 4 items

You can tick highlight any tier you recommend them to choose
Step 6: Promotion display
This setting help you to easily inform campaign to customer. Turn on "Promotion display" in Preview section on the right side to see how they display on the storefront
- Badge: There are two types of badges: Image and Text to inform the customer about the campaign
- Volume discount list: shows all discount tiers in your campaign
- Countdown timer: triggers customer's FOMP. It is shown when you set the end date

Step 7: Set up Advanced Settings
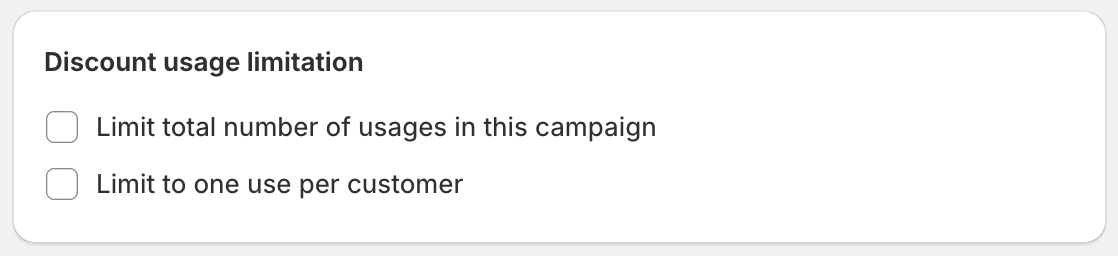
-
Discount usage limitation (Optional): You can set up the discount usage limitation in this section.
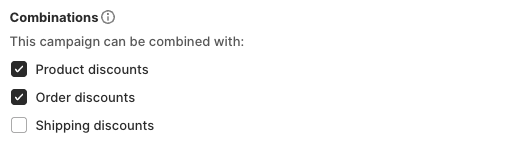
-
Combination: Enable combining this discount with Product, Order, and Shipping discounts for flexible promotional options. Adjust combinations based on your sales strategy for optimal results.
- Customer eligibility (Optional)


Here are some advanced configuration options that can help you set up a private campaign for certain customer groups:
You can only choose one of these options if necessary:

Step 8: Review campaign and publish
All the information about the campaign will appear in the Summary board. You can check your campaign in brief there to see if you've configured everything right.
After finishing your campaign review, Save to publish campaign.

Display on storefront
After publishing, the Volume Discount will then be displayed on Product pages like this:

Need more help?
If you encounter any issues or have questions, feel free to reach out to our support team via [email protected] or via our live chat - we're happy to help!