
Introduction to Order Limits
Need to make sure your customers order just the right amount? Order Limits let you set minimum and maximum rules for quantity or order value, so every B2B purchase stays within your ideal range. Let’s take a look at how you can set it up.
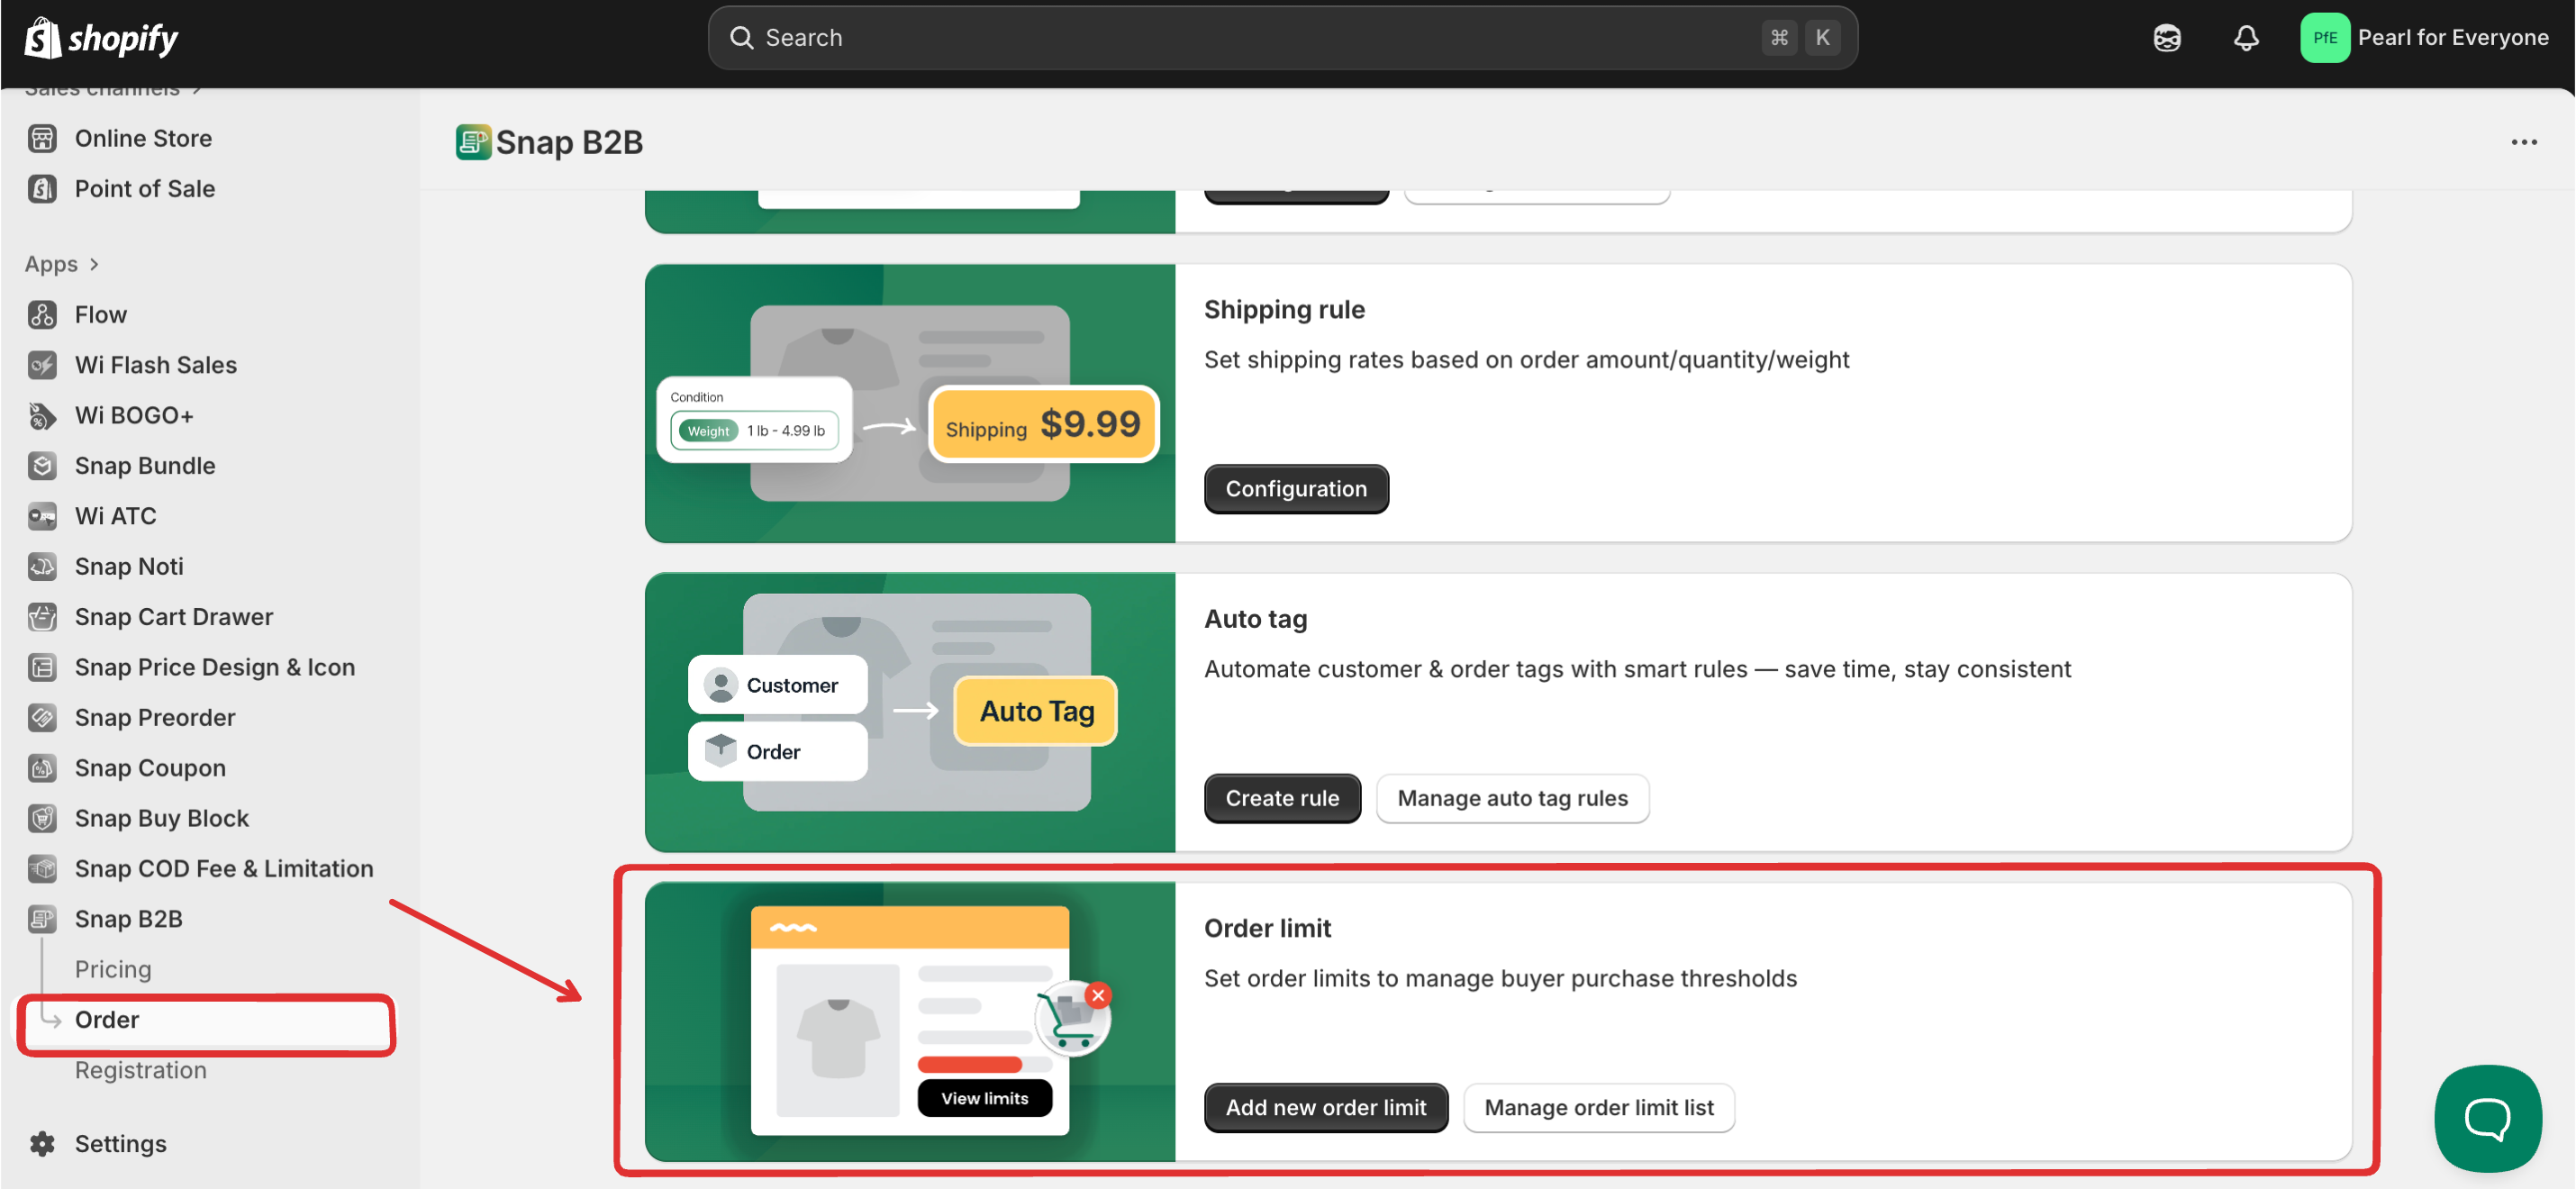
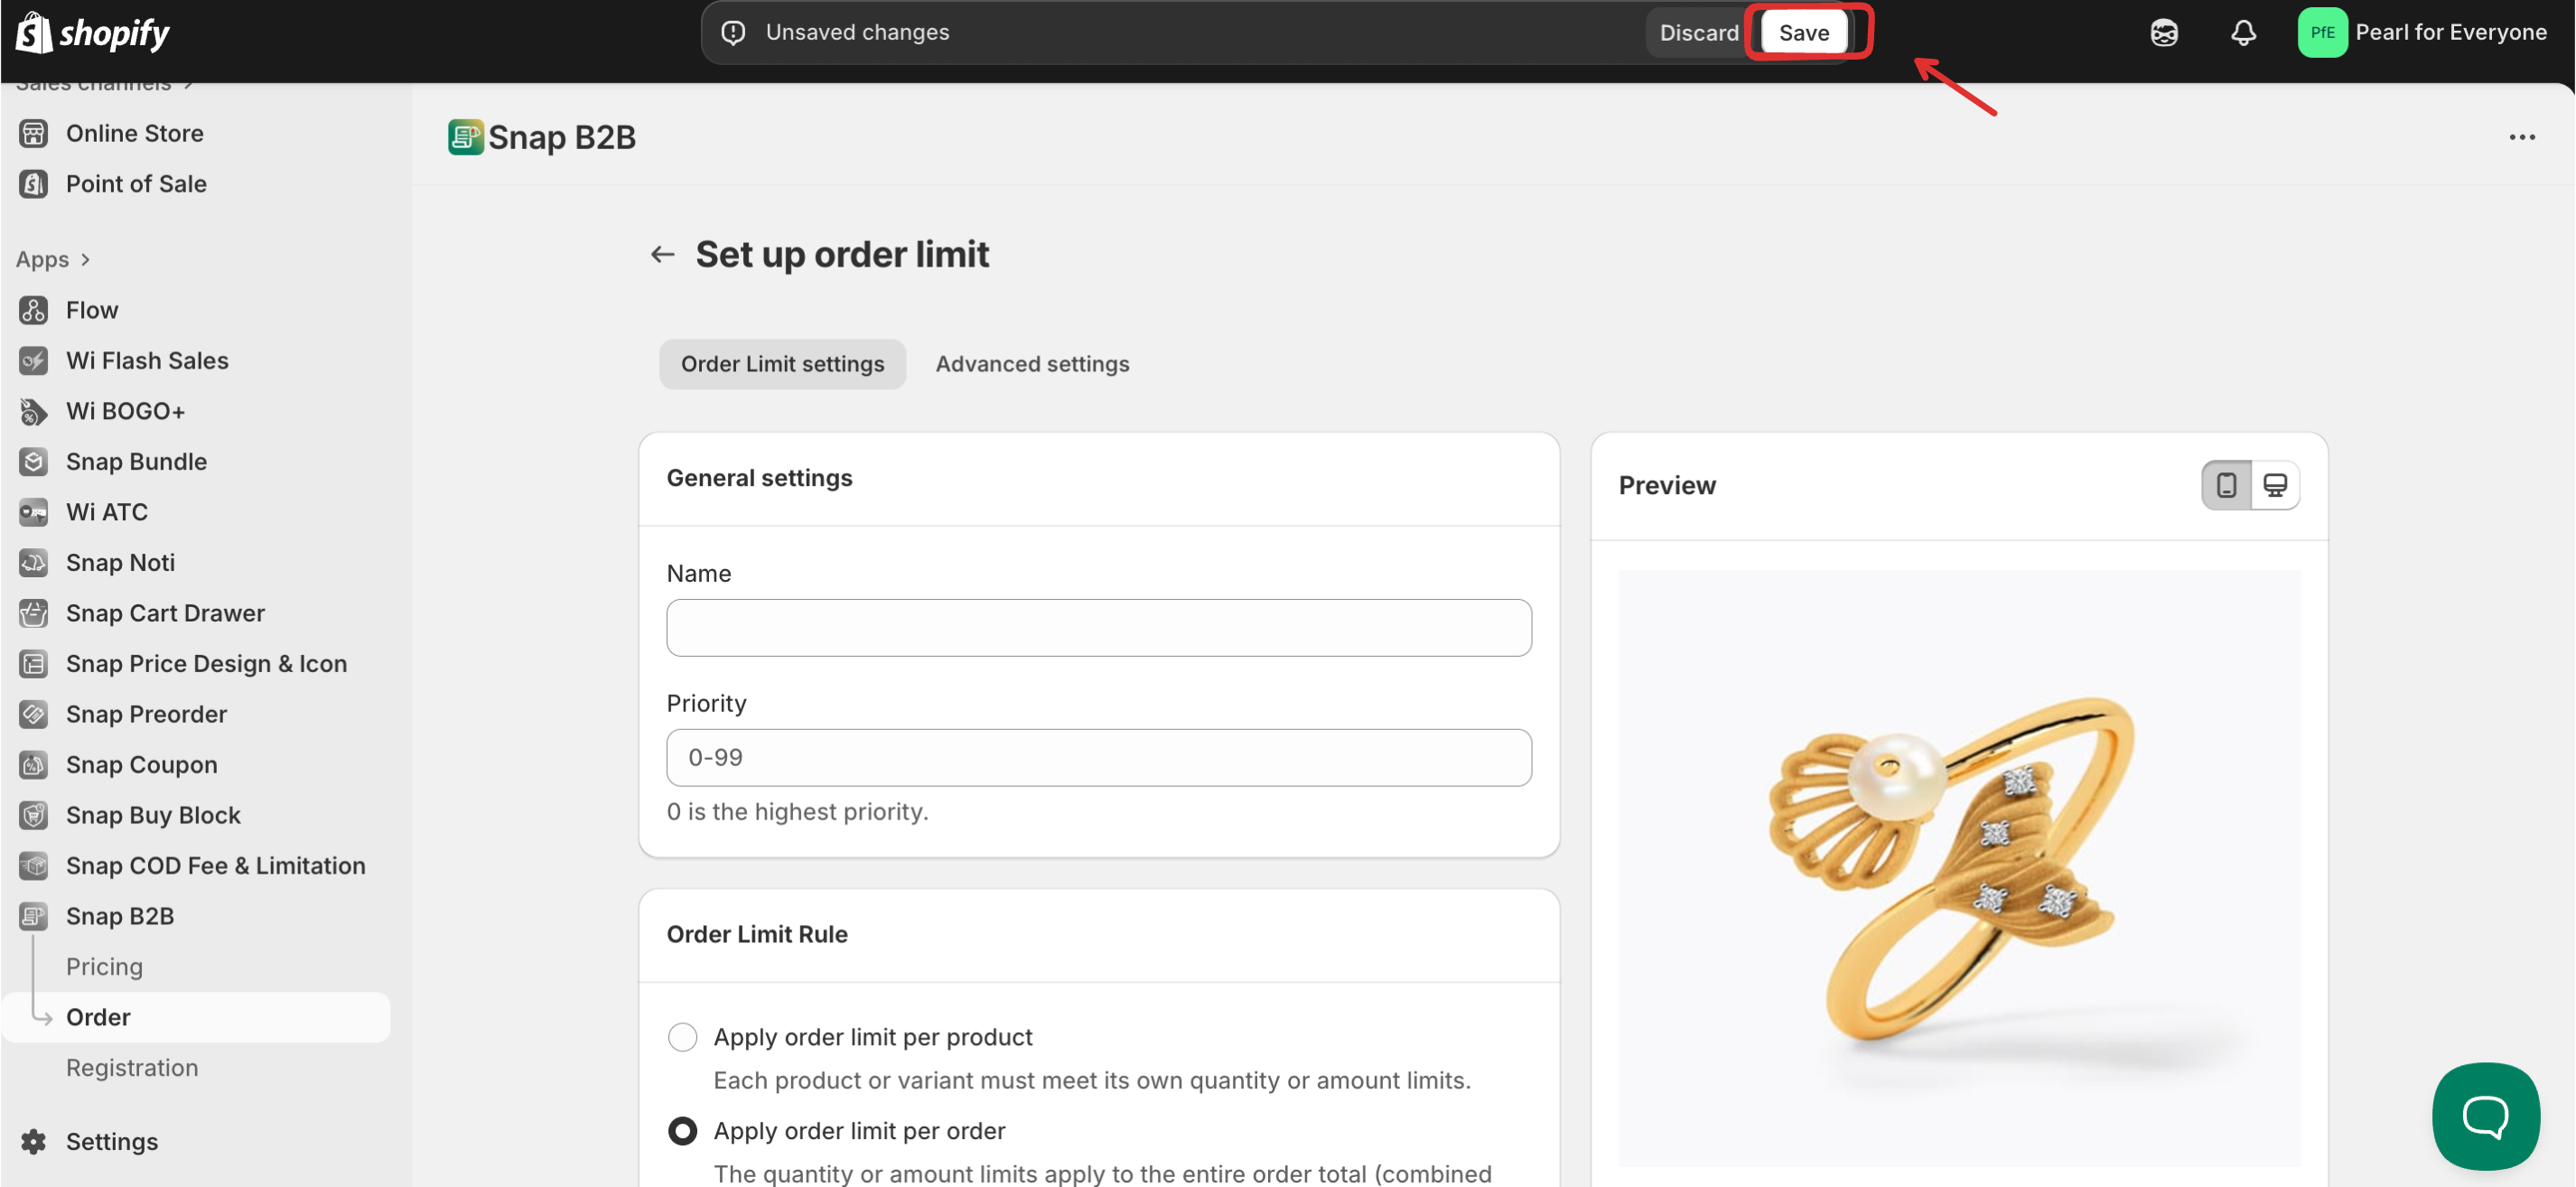
Step 1: Open the Order Limits Settings
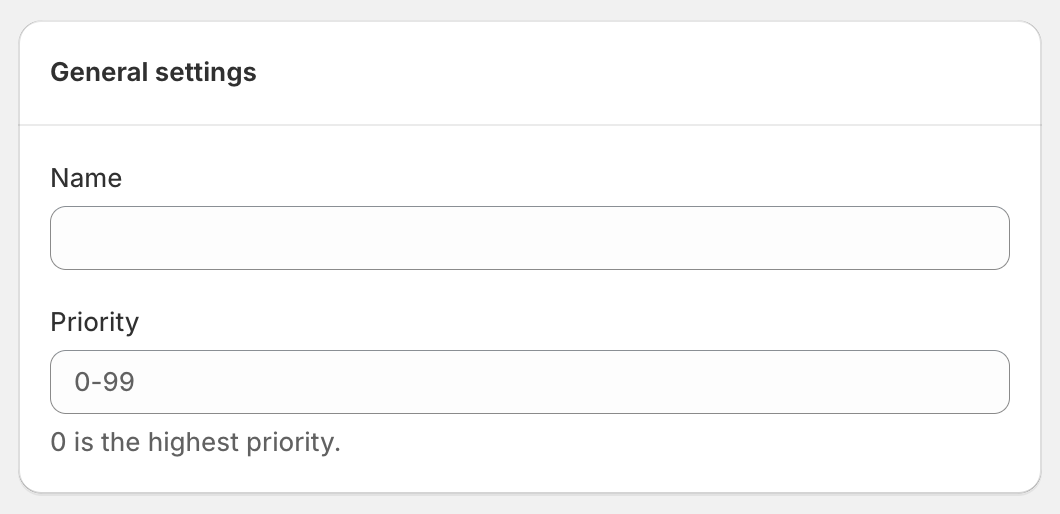
Step 2: Set up the General Settings
Name: Give your Order Limit rule a clear name.
Priority: Set the rule priority (0 = highest). Lower numbers are applied first if multiple rules overlap.
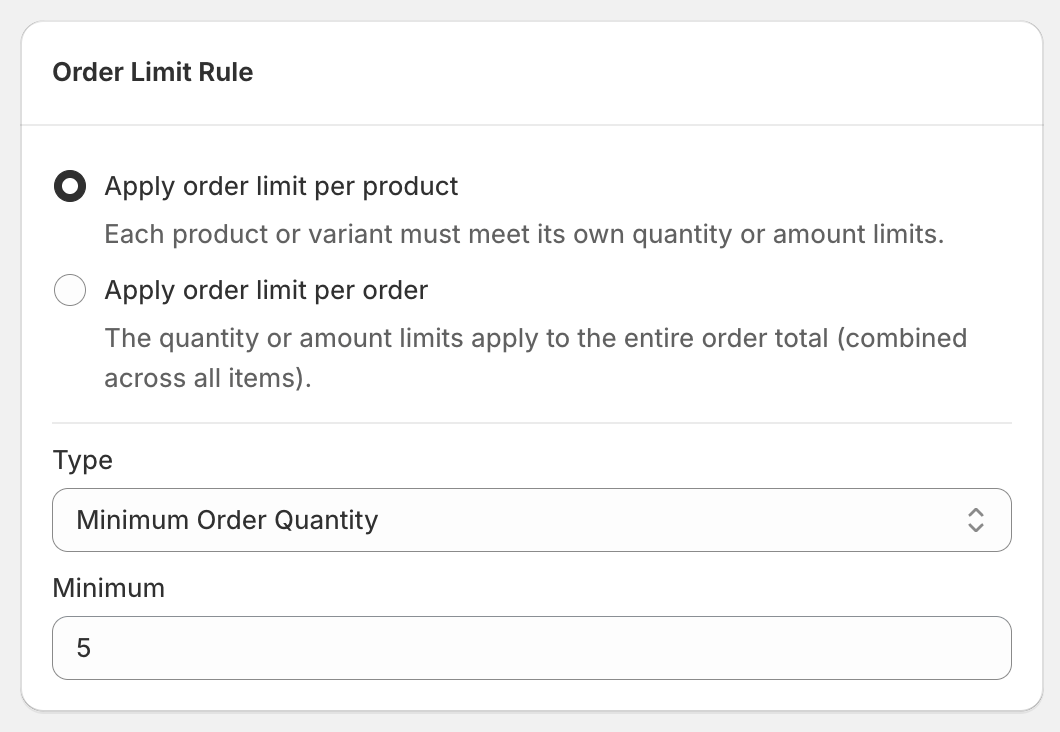
Step 3: Set up the Order Limits Rule
In this section, you can decide how your order limits will be applied:
- Apply order limit per product: Each product or variant must meet its own quantity or amount limits.
- Apply order limit per order: The limits will apply to the entire order total (combined across all items).
Then, choose your Type of limit:
- Minimum Order Quantity: The lowest number of items a customer must buy.
- Maximum Order Quantity: The highest number of items a customer can buy.
- Minimum Order Amount: The lowest total order value required.
- Maximum Order Amount: The highest total order value allowed.
Finally, enter your preferred number or amount in the Minimum / Maximum field.
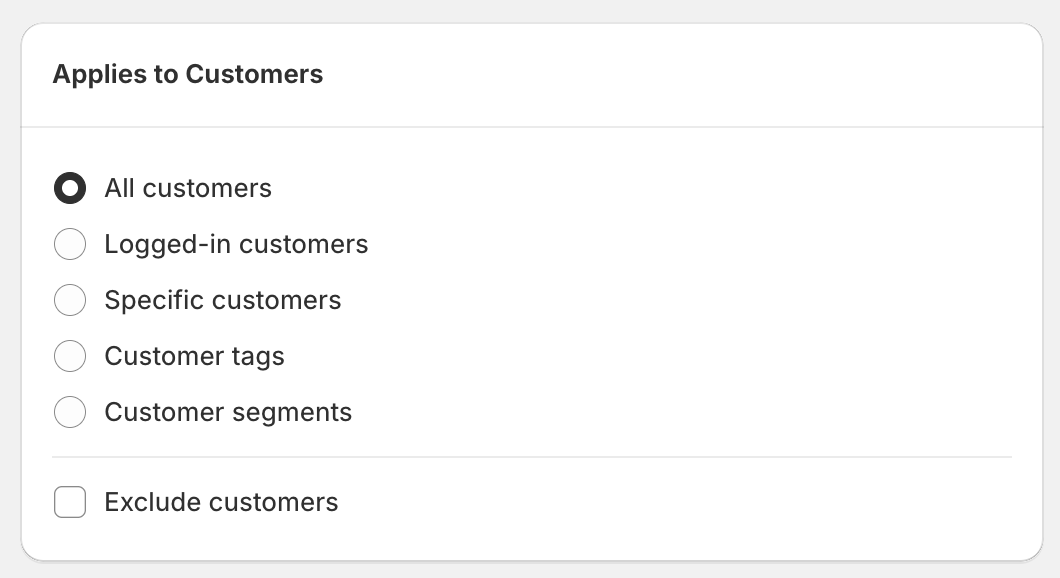
Step 4: Set up the customers the rule applies to
Next, choose which customers you want this rule to apply to.
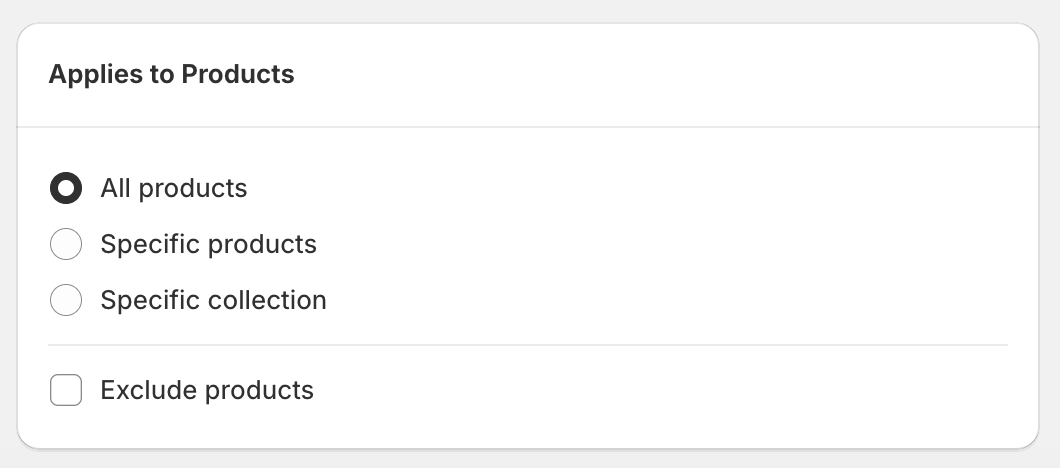
Step 5: Apply the rule to products or collections
Next, choose which products/collections you want this rule to apply to.
⚠️ This section will be hidden when the Apply order limit per order option is enabled.
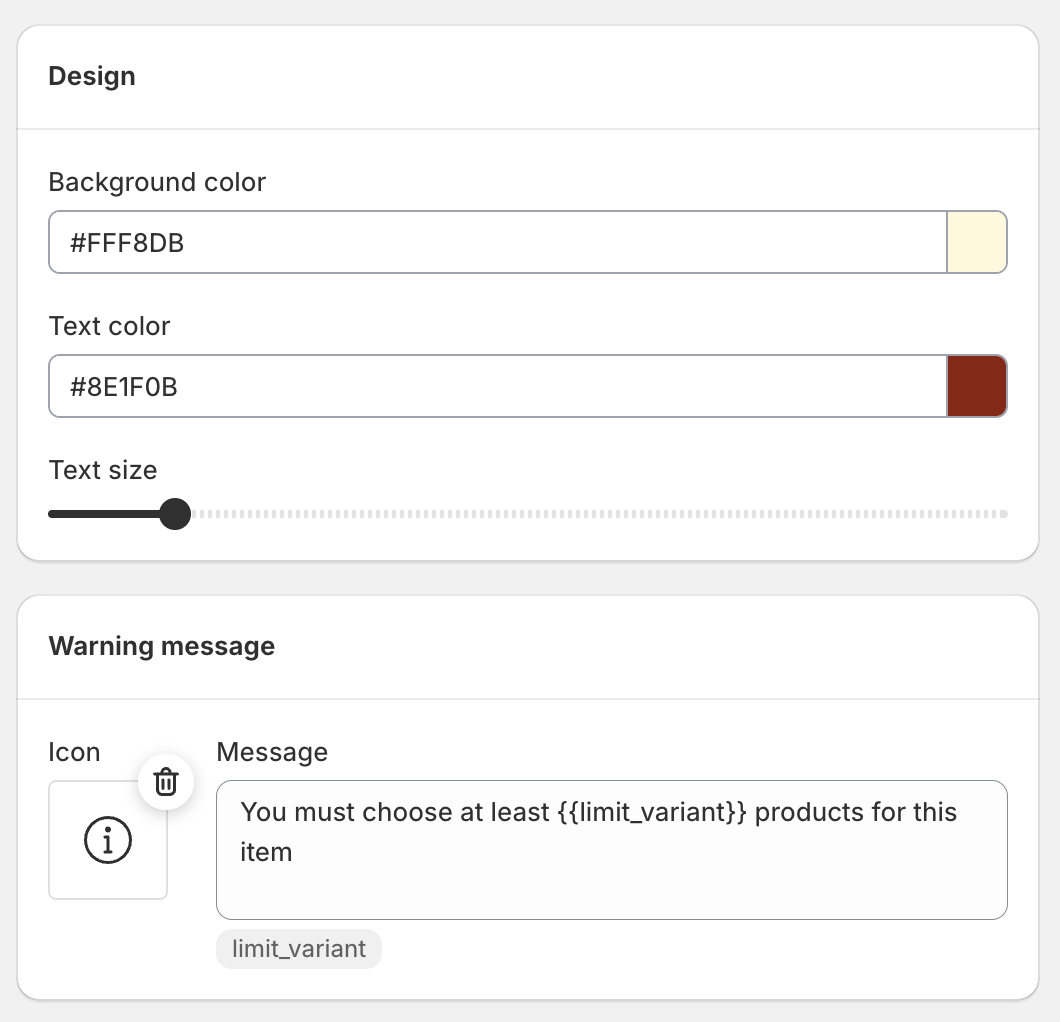
Step 6: Configure the Advanced Settings
You can customize the design and the Warning message in this setting.
Step 7: Save and activate the campaign
Don't forget to click Save when you're done setting up the campaign.
Please turn on App Block in order for the Order Limit feature to work on your storefront.


⚠️ Some notes that you need to pay attention to:
The Order Limit feature works seamlessly with Quick Order Forms and Net Term rules, ensuring consistent purchase restrictions across your store.